
How to Build a DIY Raised Garden Bed
Table of Contents
A DIY Raised Garden Bed allows you to control soil quality, improve drainage, and create an organised growing area for your favourite crops. Many gardeners find that they are a great solution for improving productivity while reducing weeds and soil compaction. If you want to make a raised bed that lasts for years, careful planning and material selection are essential.
Materials You Need for a DIY Raised Garden Bed
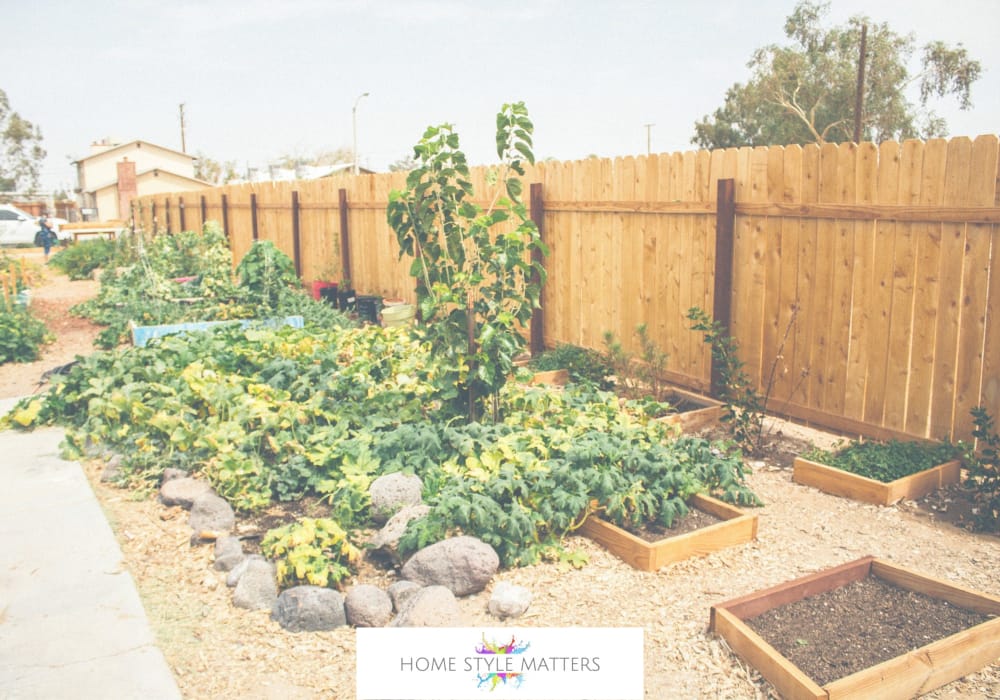
Beforebuilding a raised bed, gather all the materials you need for the project.
Recommended Materials
- Cedar boards or other rot-resistant wood
- Timber screws or galvanised fasteners
- Short boards for the short sides
- Long boards for the long side sections
- Compost and quality garden soil
- Hardware cloth for pest protection
- Staple gun to attach lining material
- Weed membrane or cardboard
- Gravel or brick for extra support
Many people choose Cedar raised bed designs because cedar boards are naturally rot-resistant and attractive. Avoid wood that has been treated with chemicals if you plan to grow vegetables.
Choosing the Best Type of Wood for a Raised Garden Bed
The type of wood you choose will affect durability and appearance.
Popular Options Include:
- Cedar boards
- Rot-resistant wood
- Railway sleepers
- Scrap wood
- Pressure-treated wood
- Lumber made of wood suitable for outdoor use
Some gardeners prefer pressure-treated lumber for longevity, while others avoid pressure-treated wood near edible crops. If using wood, ensure it is safe for food-growing environments.
Step-by-Step Guide
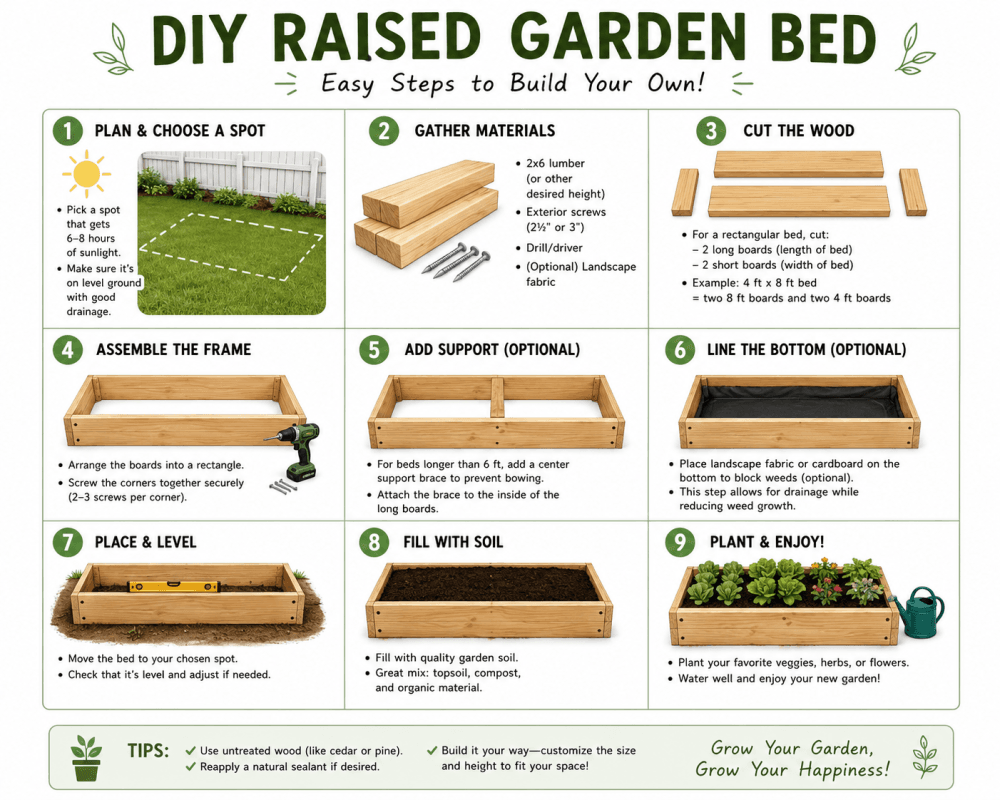
This step-by-step process makes it easy to build a simple raised bed for your vegetable garden.
Step 1: Choose a Sunny Spot in Your Garden
Select a sunny spot with at least six to eight hours of sunlight each day. Good drainage is important, especially for root vegetables and salad crops.
Your raised bed planter should also be easy to access for watering and harvesting.
Step 2: Measure and Plan the Bed Design
A common bed design measures:
- 1.2m wide
- 2.4m long
- 20cm to 40cm deep
This size allows easy access to the centre of the bed without stepping on the soil. Mark the outline carefully before assembling the planter.
Step 3: Cut the Timber and Assemble the Frame
Use long boards for the long side panels and short boards for the short sides.
Secure the timber together with screws to create a sturdy wooden raised structure. Make sure the sides of the bed are level before tightening all fixings.
You can also make a raised garden bed using brick, cinder blocks, or railway sleepers depending on your preferred style.
Step 4: Line the Inside of the Raised Bed
To protect the timber and improve durability, line the inside with landscape fabric or plastic sheeting.
Many gardeners use a staple gun to attach the lining securely around the bottom of the planter and inner walls.
Adding hardware cloth underneath can help prevent pests from digging into the soil.
Step 5: Construct Your Raised Beds in Position
Move the frame into its final position in the garden or on a deck area.
If placing the raised bed using paving or decking surfaces, ensure water can still drain away properly.
A raised garden bed placed on a deck may require extra drainage holes or gravel underneath.
Step 6: Fill the Bed with Soil and Compost
The first layer can include coarse organic material or small branches for drainage.
The second layer should contain nutrient-rich compost mixed with topsoil.
Finally, the top layer should consist of high-quality garden soil suitable for growing vegetable crops.
Use a soil calculator to determine how much soil your planter requires. A calculator to determine how much compost and soil is needed can help avoid waste.
When you fill the bed, ensure the soil is evenly distributed across the entire surface.
DIY Raised Garden Ideas for Beginners
If you are creating your first raised beds, start with a small and manageable planter.
Simple Container Ideas
- Wooden raised planter boxes
- Brick vegetable beds
- Raised bed using cinder blocks
- Compact herb gardens
- Small salad garden designs
An easy DIY project can be completed in a single weekend with basic tools and materials.
Irrigation System Tips
Installing an irrigation system can save time and improve watering consistency. Drip irrigation works especially well because it delivers moisture directly to plant roots while reducing water waste. This is especially useful during warm weather when raised beds dry out faster.
Common Mistakes
Avoid these common errors when you make a raised planter:
- Choosing the wrong type of wood
- Using timber treated with chemicals
- Overfilling the bed
- Ignoring drainage requirements
- Placing the raised bed in shade
- Building the planter too wide
Careful planning ensures your raised garden bed remains productive for many years.
Why Raised Beds Are More Popular Than Ever
The recent kitchen garden revival has encouraged more homeowners to create productive outdoor growing spaces. A DIY raised planter offers flexibility, simplicity, and a rewarding way to grow fresh produce at home. Whether you want to construct your raised beds beside a patio, lawn, or deck, the results can dramatically improve both the appearance and functionality of your garden.
Conclusion
Learning how to build a raised vegetable bed is one of the most rewarding DIY projects for any gardener. a well-planned raised bed can provide years of successful growing. By following this step-by-step guide, you can confidently make a raised garden bed that suits your space, budget, and gardening goals.